Apple’s annually scheduled iOS update will bring exciting new features to your iPhone However, if own an older iPhone that isn’t equipped to benefit from these features. Or prefer to wait for a few weeks so that you can give Apple an opportunity to correct those inevitable glitches and bugs and issues, you could not be thrilled to learn that the update has been downloaded without asking.
iPhone was updated without having to ask. How to stop software update on Samsung Galaxy s20?

After Apple announces the iOS upgrade, iPhones will automatically download the application from Apple’s servers. After that, users will receive an alert pop-up on their iPhone to inform them that software is ready to be downloaded. Although, Apple does not install the iOS update onto your iPhone without your permission.
Some people prefer to know that Apple would not have downloaded the installer on their iPhone initially, particularly when they aren’t planning to upgrade to the latest release of iOS.
Also, people aren’t necessarily happy to see the installers for software updates to software occupying the space of their device. There are few things that can be as irritating as the iPhone continuously showing “Install Now” and “Remind Me Later” messages when they nag you to install an iOS update you do not wish to install.
You can regain the control over your disable automatic app updates by switching off “Automatic Updates” and never let you iPhone get an iOS update unless you instruct it to.
What is Software Update?

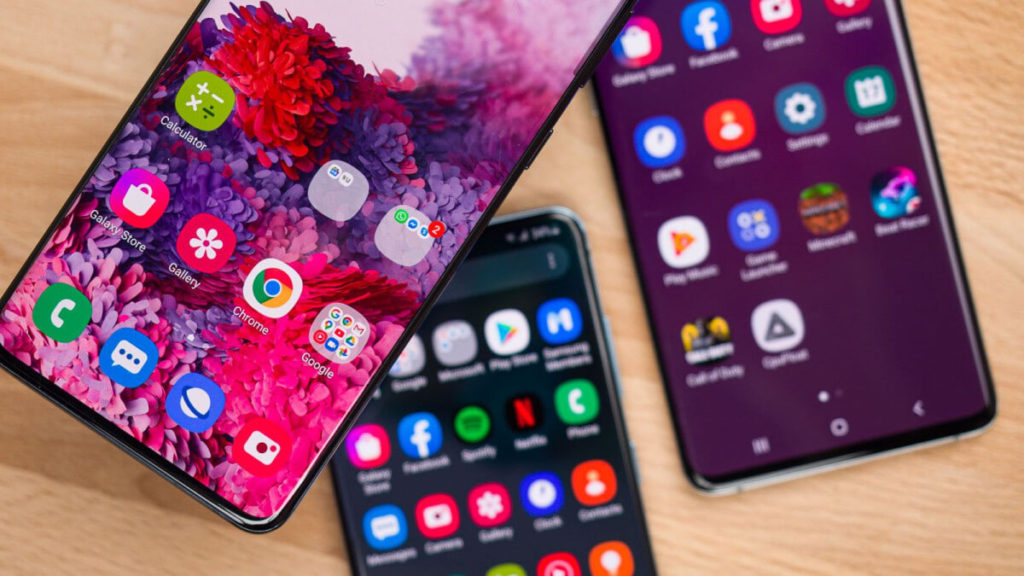
Software Update is a critical aspect of keeping your Samsung Galaxy S20 running smoothly and securely. It refers to the process of installing the latest software update loop and security patches on your device.
Software updates can provide new features, enhancements, bug fixes, and most importantly, ensure the security and stability of your phone.
These updates are typically released by Samsung or the Android operating system and are essential for maintaining the overall performance and functionality of your device.
However, some users may prefer to stop software updates to avoid any potential compatibility issues or simply to retain control over when and how their phone updates.
In the following sections, we will explore various methods to disable software updates on a Samsung Galaxy S20.
Disable app updates for the Samsung Galaxy S20

The applications on your smartphone may be automatically updated, automatically while connected to a WiFi or mobile network. This means that the data you have stored could run through faster, and could use up lots of space in your smartphone. If you do not want apps to automatically update you can follow these instructions:
Android 9
Remove automatic updates to apps on Google Android 9:
- Go to the Play Store.
- Press the menu button on the left side on the display.
- Scroll to the bottom and then tap “Settings’.
- Tap ‘Automatically update apps’.
- Do not update automatically applications’.
Android 7
Remove automatic updates to apps on Google Android 7:
- Go to the Play Store.
- Use the menu keys on the left side on the display.
- Scroll down and click “Settings’.
- Tap ‘Automatically apps’.
- Click ‘Do not auto-update applications’.
How to stop software update on Samsung Galaxy s20?

Based on the type of auto update system that you would like to stop, you can choose between two options to disable the process.
Method 1
Step 1: Enter Settings Options
The first step is to go into the settings developer options of your smartphone. It is evident on the screen that the icon appears like the shape of a gear. It is possible to find this icons in your phone’s settings menu options or applications.
Step 2: Click on Apps
If you open the Settings tab, you’ll see the option “Apps. After that, click apps.
When you click on the option for auto update apps, you’ll notice the two dots (:) on the upper right-hand corner. You will also see option to of showing system how to update apps on your Android phone. After that, you can go to screen system updates apps. Then you will comprehend more clearly what the images are shown below.
Step 3: Click On Software
It is necessary to scroll down once you have entered the application auto update system. There is a “update” option. You will see two options for updating software.
One is a green symbol. Another one is blue. Both icons are crucial for getting rid of the Software auto-update system.

Step 4: Click on Battery
Once you’ve completed the initial option to update your software You will be presented with the option “battery”.
After that, tap the battery power button, and you’ll be able to see “Allow background activities”. This must be turned off. blue setting. Also, it is necessary to remove the checkmark “allow background activities”.
Step 5: Click on Storage
- After checking off “allow background activity”, you’ll go back to choose the storage option.
- After entering the storage, you’ll see the “Clear Data” and “Clear wipe cache partition” choices.
- Tap on Clear factory data reset.
Step 6: Click On The Notification
- Once you have clicked on clear factory data reset then you’ll go back to scroll to the bottom, and then you’ll find”notification” “notification” option.
- Choose the notification icon and you’ll be able to be able to see “app icon badges” and select the option to uncheck it.

Step 7: Click On 2nd Software Update
- Now you must choose the next update button. It is the primary option for which the software update instructions are provided.
- When you’ve completed entering security settings for the software, you can then select”Clear Cache” after entering the software update “Clear wipe cache partition” option.
Step: 8 Tap On The Notification Option
- When you click on the option to clear wipe cache partition, you’ll go back to discover the notification’. Decide the notification button.
- There are app icon badges as well as the ”General” choices.
- After that, you must take off the icon badges of your app. If this is enabled other security settings, you can turn it off.
Step 9: Go to General Options
- Below the badge for Google Play Store app icons, there is a section called general options.
- There is also a choice called important.
Step 10: Go to the Importance Option
Now, click on”Importance. You will see several options, including Medium, Low and Urgent. You can remove the update software using the selection Low. How to Use Always On Display for Samsung Galaxy S10?
Method 2: Disable the Update Checking Option

You can turn off the auto update apps auto update system with options that will pester your with the latest updates.
Step 1. You have to take the sim card from the Samsung device.
Step 2. Select the option to factory data reset your device back to factory settings and allow the device to restart. Therefore, you need to unplug the Wi-Fi signal to do factory data reset on the Samsung device.
Step 3: Complete the options for setup that are displayed.
Step 4. Following that is the most important thing that is to do. If you have completed the preceding steps correctly, you can turn off the check option for software updates.
Step 5. Insert the SIM card into the device. Follow Samsung Galaxy S10 SIM Card Size – The Best Choice if any doubts. Now you’re completely free of updates.
How to Schedule Auto-Updates on your Phone

If you are programming your phone to perform disable automatic updates on a specific date, we suggest choosing the time that you will not require your phone for more than one hour.
- Tap down on the upper edge of the screen to show the options menu.
- Make sure to tap the cog (also known as gear) icon. This typically appears located in the upper left corner
- Click “Scheduled update”
- Toggling “Scheduled software updates” to On
- Pick the time that you’d like to have your phone run the disable automatic updates.
Tips: Restart your device to make sure reboot the device and that all updates are active.
Final

Now you know how to disable automatic application updates on Samsung Galaxy S20 and turn off this process for the operating system updates. Many users consider such actions unnecessary. They think that the manufacturer is always right, so the installation of new and enable automatic updates and variants of the program is always system updates. This is not the case.
There are at least three reasons why it is worth removing software auto-update on Samsung Galaxy S20.
Background downloading and installation of software on phones with a weak resource can drain resources. There are cases when a user cannot answer an urgent e-mail or dial a person’s number because the phone slows down a lot. The reason may be downloading a new version of an application.

The user wants to study what exactly the developer options has added to the program. Sometimes new options remain unused because the person does not know about the changes made.
According to reviews, the new version of the software update loop works worse than the previous version. In this case, you need to think about the relevance of installing this or that software. To avoid trouble, it is better to update the software on Samsung manually after studying the changes and the opinion of users about the new version.
FAQ
How do I stop a software?
What could I do? What can I do? from updating my Android phones automatically?
- You are able to auto download Google Play Store app for your Android phone.
- Choose from a drop-down menu.
- Choose a configuration.
- The factory data reset below is not made available to the accessible by the site’s respective webmaster.
- Start the application and then click to automatic update.
- Choose to remove the any auto-software update in the application. Then, click OK.
How do I force an Android update to stop?
To turn off or disable auto updates and automatic software updates again, go to Settings, then decide Software Update. Click on the Settings icon to open the menu of settings on the right. Select auto download and Install Autos. Then, click the option to disable auto update.
YOU MAY ALSO LIKE...


Leave a Reply